In modern web development, speed is no longer optional—it's a requirement. Users today expect websites to load almost instantly. And one of the biggest "Achilles' heels" slowing you down is Bundle Size—the total size of all JavaScript the browser must download, parse, and execute to display your React app.
Think of your app as a mountain climber, and bundle size as the backpack they carry. A light backpack lets them move quickly and reach the summit with ease. A heavy, overloaded backpack slows them down or even makes them give up. This article will help you turn your app into an "elite climber" by analyzing and optimizing bundle size as efficiently as possible.
Why Does Bundle Size Matter So Much?
Before diving into techniques, let's clarify why we should be "obsessed" with bundle size:
- Page Load Speed: The most obvious reason. The bigger the bundle, the longer it takes to download—especially on slow mobile networks. Long waits are the #1 enemy of user experience.
- User Experience (UX): A slow-loading site frustrates users and increases bounce rates. Users won't hesitate to leave your site for a faster competitor.
- SEO Optimization: Search engines like Google prioritize fast-loading sites. Optimizing bundle size means better SEO rankings for your website.
- Mobile Data Costs: For users on 3G/4G, a large bundle means higher data costs. Optimizing bundle size shows respect for your users' "wallets".
Stage 1: Analyze & Diagnose – Where Are We Getting Big? 🕵️♂️
You can't optimize what you can't measure. The first and most important step is to analyze which parts are taking up the most space in your bundle.
Webpack Bundle Analyzer
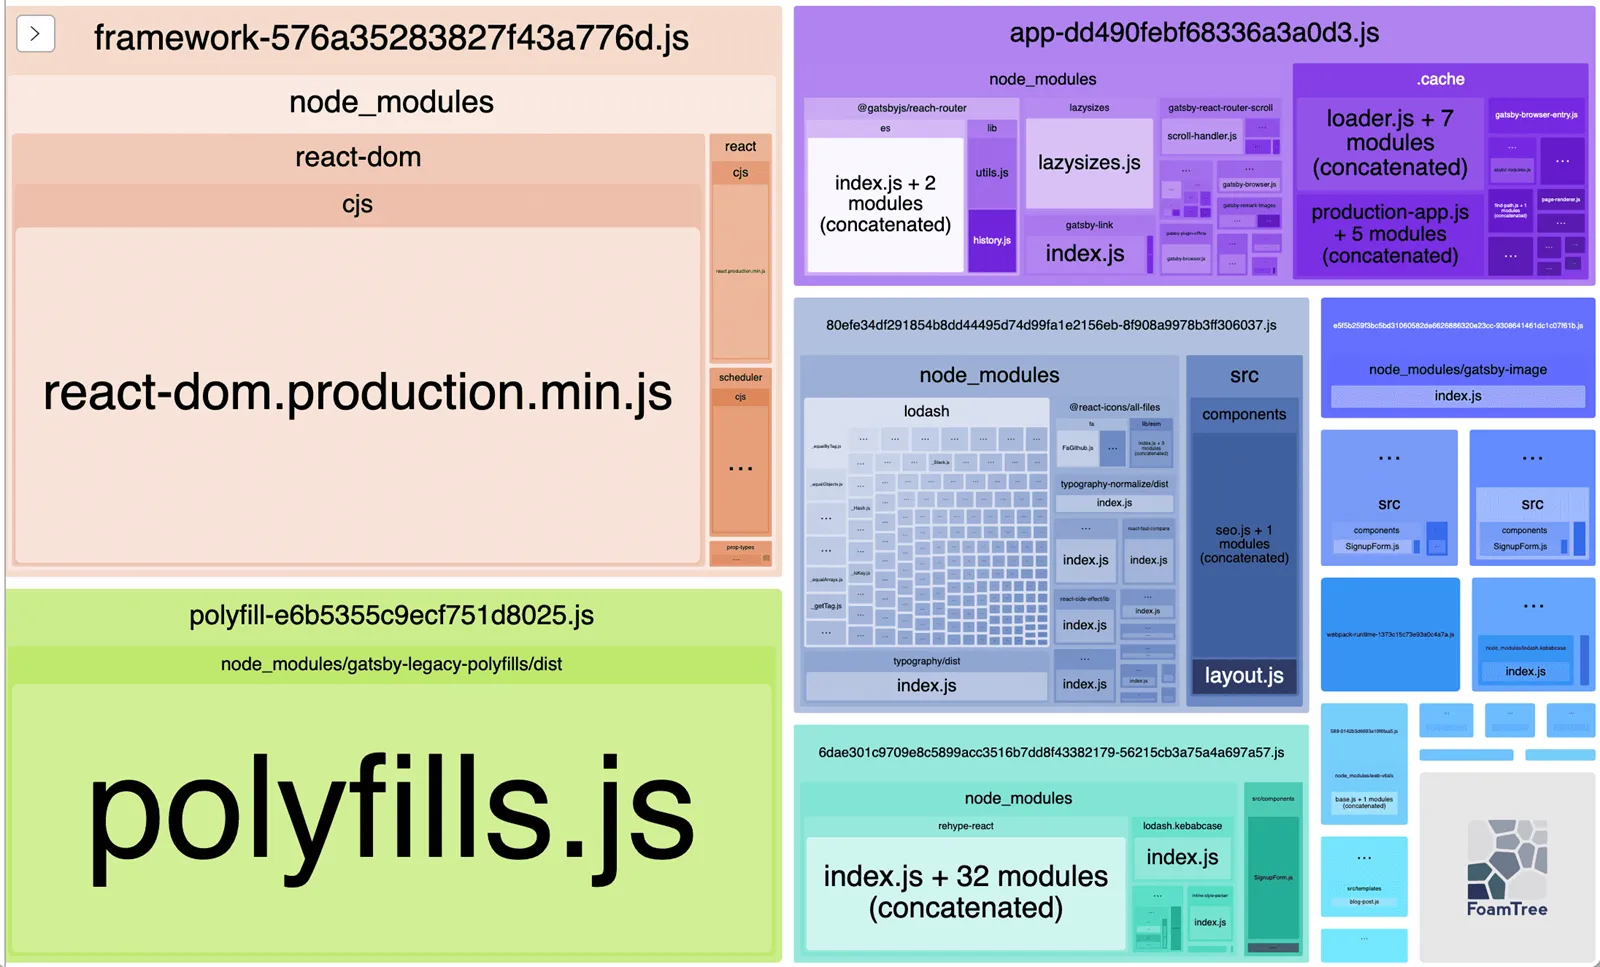
This is an essential tool. It creates a visual map (treemap) of your bundle, showing exactly how much space each library and component takes up.
How to install and use:
-
Install the package:
npm install --save-dev webpack-bundle-analyzer # or yarn add -D webpack-bundle-analyzer -
For
Create React Appprojects (without ejecting), usecra-bundle-analyzer:npx cra-bundle-analyzer -
For custom Webpack configs, add the plugin to
webpack.config.js:const BundleAnalyzerPlugin = require('webpack-bundle-analyzer').BundleAnalyzerPlugin module.exports = { plugins: [new BundleAnalyzerPlugin()], }
After running, a new browser tab will open with a chart. Take time to "investigate":
- The "giants": Are there any libraries taking up an unusually large chunk? (e.g.,
moment.js, fulllodash) - Duplicate code: Are any modules appearing in multiple chunks?
- Your code: How much space do your own components and utilities take up?
Other Helpful Tools
- Source Map Explorer: Similar to Webpack Bundle Analyzer but works with source maps to link compiled code back to the original source.
- BundlePhobia: A great website to check the size of any npm package before installing it.
Stage 2: Optimize & "Treat" – Effective "Weight Loss" Techniques 🛠️
Once you've identified the culprits, it's time to act.
1. Code Splitting – Don't Make Users Download Everything at Once
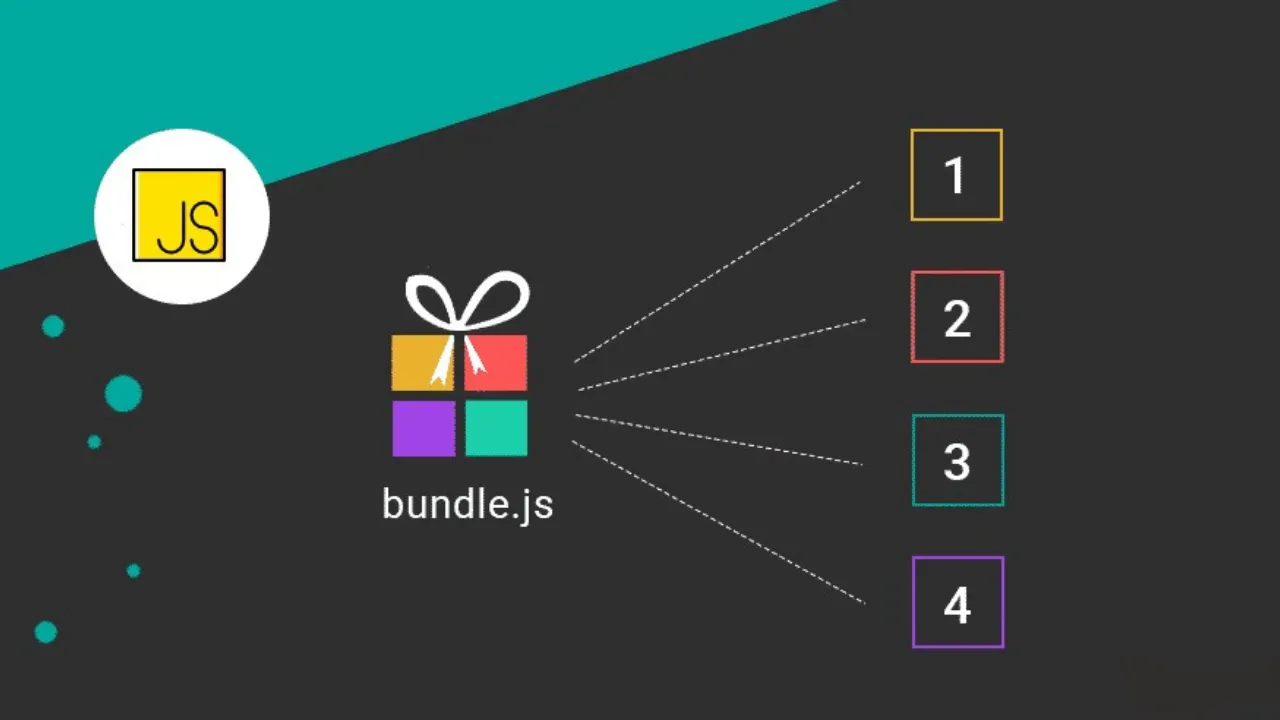
This is the most powerful technique. Instead of creating one huge bundle.js, split it into smaller "chunks". The browser only downloads the chunks needed for the current screen.

React provides React.lazy() for easy component-level code splitting. This is especially effective for route-based splitting.
Example:
import React, { Suspense, lazy } from 'react'
import { BrowserRouter as Router, Routes, Route } from 'react-router-dom'

// Instead of direct imports
// import HomePage from './pages/HomePage';
// import AboutPage from './pages/AboutPage';

// Use React.lazy
const HomePage = lazy(() => import('./pages/HomePage'))
const AboutPage = lazy(() => import('./pages/AboutPage'))

const App = () => (
  <Router>
    {/* Suspense provides a fallback UI (e.g., spinner) while loading */}
    <Suspense fallback={<div>Loading...</div>}>
      <Routes>
        <Route path="/" element={<HomePage />} />
        <Route path="/about" element={<AboutPage />} />
      </Routes>
    </Suspense>
  </Router>
)
When users visit the homepage, they only download the code for HomePage. The code for AboutPage is only loaded when they navigate to /about.
2. Dependency Auditing – Review Your Libraries
Open your package.json and ask for each library:
-
"Do I really need this?": Remove unused libraries.
-
"Is there a lighter alternative?": This is crucial.
-
Replace
moment.js(large and no longer actively developed) withdate-fnsorday.js. -
Instead of importing the whole
lodashlibrary, only import the functions you need:// 👎 NOT RECOMMENDED import _ from 'lodash'; _.debounce(...); // 👍 RECOMMENDED import debounce from 'lodash/debounce'; // Or better, use lodash-es for optimal tree-shaking import { debounce } from 'lodash-es'; debounce(...);
-
-
Use BundlePhobia to compare the sizes of similar libraries.
3. Tree Shaking – Remove Unused Code
Tree shaking is the process of removing unused (dead) code from the final bundle. Modern bundlers like Webpack and Vite do this automatically. For best results:
- Use ES Modules (
importandexport): Tree shaking doesn't work with CommonJS (require). - Watch for libraries with side effects: Some libraries may be configured so bundlers don't remove them. Make sure you understand your dependencies.
4. Optimize Images and Static Assets
Images are often the heaviest part of a web page.

- Use modern formats: Use WebP or AVIF instead of JPEG and PNG—they offer similar quality at much smaller sizes.
- Compress images: Use tools like Squoosh or bundler plugins to compress images without significant quality loss.
- Lazy Loading: Use the
loading="lazy"attribute on<img>tags so browsers only load images as they come into view.
5. Dynamic Import – For Rarely Used Features
Besides React.lazy, you can use the import() syntax to load a module conditionally. For example, you have a heavy CSV export feature only used when a button is clicked.
const handleExportClick = () => {
  // 'heavy-csv-exporter' is only loaded when this function is called
  import('heavy-csv-exporter').then((exporterModule) => {
    exporterModule.default.export(data)
  })
}

return <button onClick={handleExportClick}>Export to CSV</button>
6. File Compression
After optimizing your source code, the final step is to compress your bundle files before sending them to the browser. Make sure your server is configured to use Gzip or, even better, Brotli (which compresses more efficiently than Gzip).
The Proper Bundle Size Optimization Workflow
Optimizing bundle size isn't a one-time job. Make it a habit in your development process:
- Measure: Run
webpack-bundle-analyzerto get a baseline. - Identify: Find the "hot spots" to optimize.
- Implement: Apply one or more of the above techniques (e.g., code splitting a route).
- Re-measure: Run the analyzer again to see improvements.
- Repeat: Continue the process until you're satisfied with the results.
Conclusion: Bundle Size Optimization is an Art
Optimizing bundle size is an art of balancing features and performance. By mastering analysis tools and optimization techniques, you not only create faster, smoother React apps, but also show professionalism and respect for your users' experience.
Start "lightening your app's backpack" today to reach new heights! 🚀
![[Advanced React] What Are Synthetic Events in React? Do You Really Understand Them?](/images/blog/synthetic-events-in-react.webp)
![[Advanced React] What is React Fiber? Understanding Its Architecture and How It Works](/images/blog/react-fiber.webp)
![[Advanced React] Virtual DOM in React: The Foundation of Performance and How It Works](/images/blog/virtual-dom-in-react.webp)
![[Advanced React] A Detailed Guide to Time Slicing and Scheduling in React](/images/blog/time-slicing-and-scheduling-in-react.webp)