In modern software development, building a great React app isn’t just about writing code that works. To ensure your app is stable, maintainable, and scalable in the future, testing is an essential step.

This article will help you go from a beginner to confidently applying the most effective testing strategies in your React projects. We’ll explore everything from the basics to advanced techniques, with clear, practical examples.
Why is Testing So Important? 🤔
Imagine you just launched a new feature and users start complaining about bugs. You rush to fix one bug, but accidentally break another feature. This fix-break loop is a nightmare. Testing helps break that cycle by:
- Ensuring quality: Catching bugs early in development, before they reach users.
- Boosting confidence when refactoring: You can confidently improve and optimize code without fear of breaking existing features. Your test suite is your safety net.
- Improving code architecture: Writing testable code usually means writing clear, modular, and understandable code.
- Living documentation: Tests describe exactly how your components or functions should behave, serving as always-up-to-date documentation.
The Testing Pyramid: A Smart Testing Strategy
Not all tests are created equal. The testing pyramid is a classic model for distributing your testing efforts wisely:
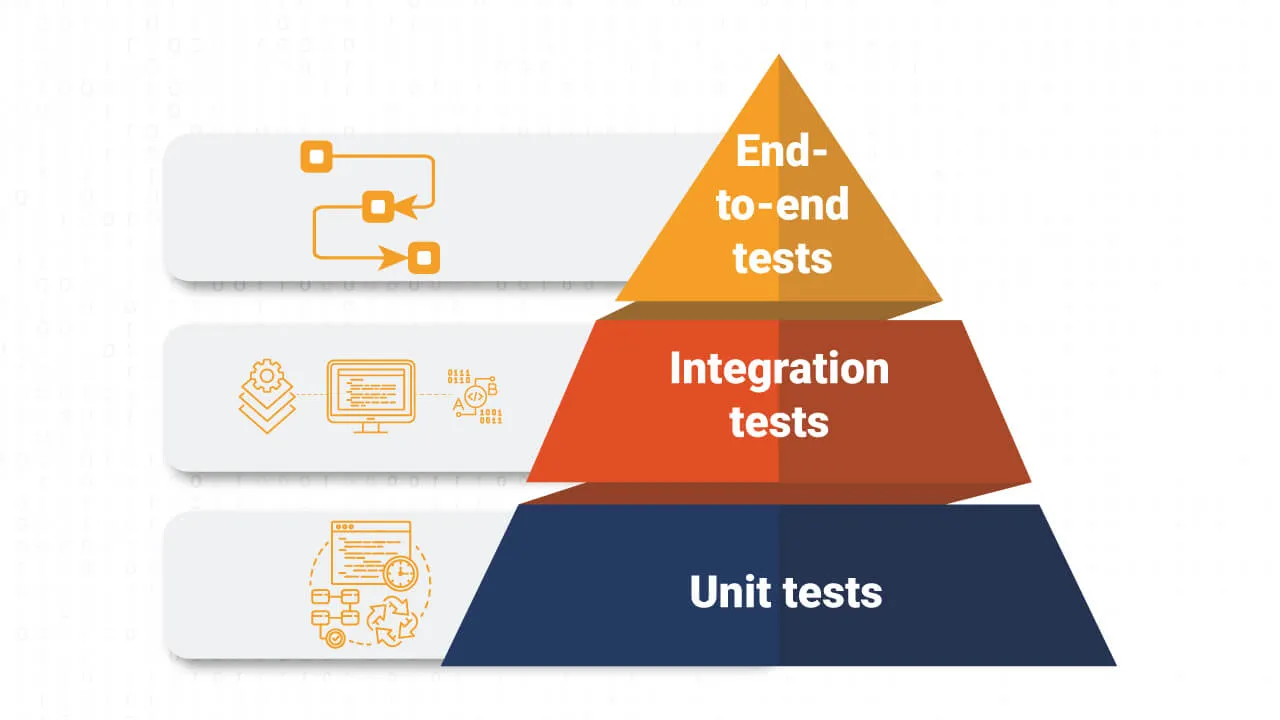
- Unit Tests – The Foundation: The most common type. They test the smallest pieces of code in isolation (e.g., a component, a function). They run fast, are simple to write, and provide instant feedback.
- Integration Tests – The Middle Layer: Test the interaction and combination of multiple units. For example, checking if clicking "Add to cart" updates the cart component correctly. They’re slower than unit tests but ensure parts of your app work well together.
- End-to-End (E2E) Tests – The Top: Simulate the entire user flow in your app, from start to finish. For example: open the site → log in → search for a product → add to cart → checkout. They’re the slowest and most complex, but give the highest confidence in your system as a whole.
Golden rule: Write lots of unit tests, a reasonable number of integration tests, and only a few critical E2E tests.
The Best Tools for Testing React
The React ecosystem offers many powerful tools for testing. Here are the most important ones you should know:
1. Jest: The Backbone of Testing
Jest is a JavaScript testing framework developed by Facebook. It’s extremely popular and often comes pre-configured when you create a React project with Create React App.

- All-in-one: Jest provides everything you need: a test runner, assertion library, and the ability to mock data/functions.
- Snapshot Testing: A unique feature that lets you "snapshot" a component’s structure. On future test runs, Jest compares the new snapshot to the saved one to ensure the UI hasn’t changed unexpectedly.
- Speed: Jest optimizes parallel test runs for fast feedback.
2. React Testing Library: The Right Testing Philosophy
Built on top of Jest, React Testing Library doesn’t focus on implementation details of components, but on how users interact with them.

- Philosophy: "Test your software the way users use it." Instead of checking a component’s
stateorprops, you find elements on the page (like a user would), interact with them (click, type), and check what’s displayed on the screen. - More robust: This approach makes your tests less brittle. You can refactor component internals freely—as long as the user-facing behavior doesn’t change, your tests will still pass.
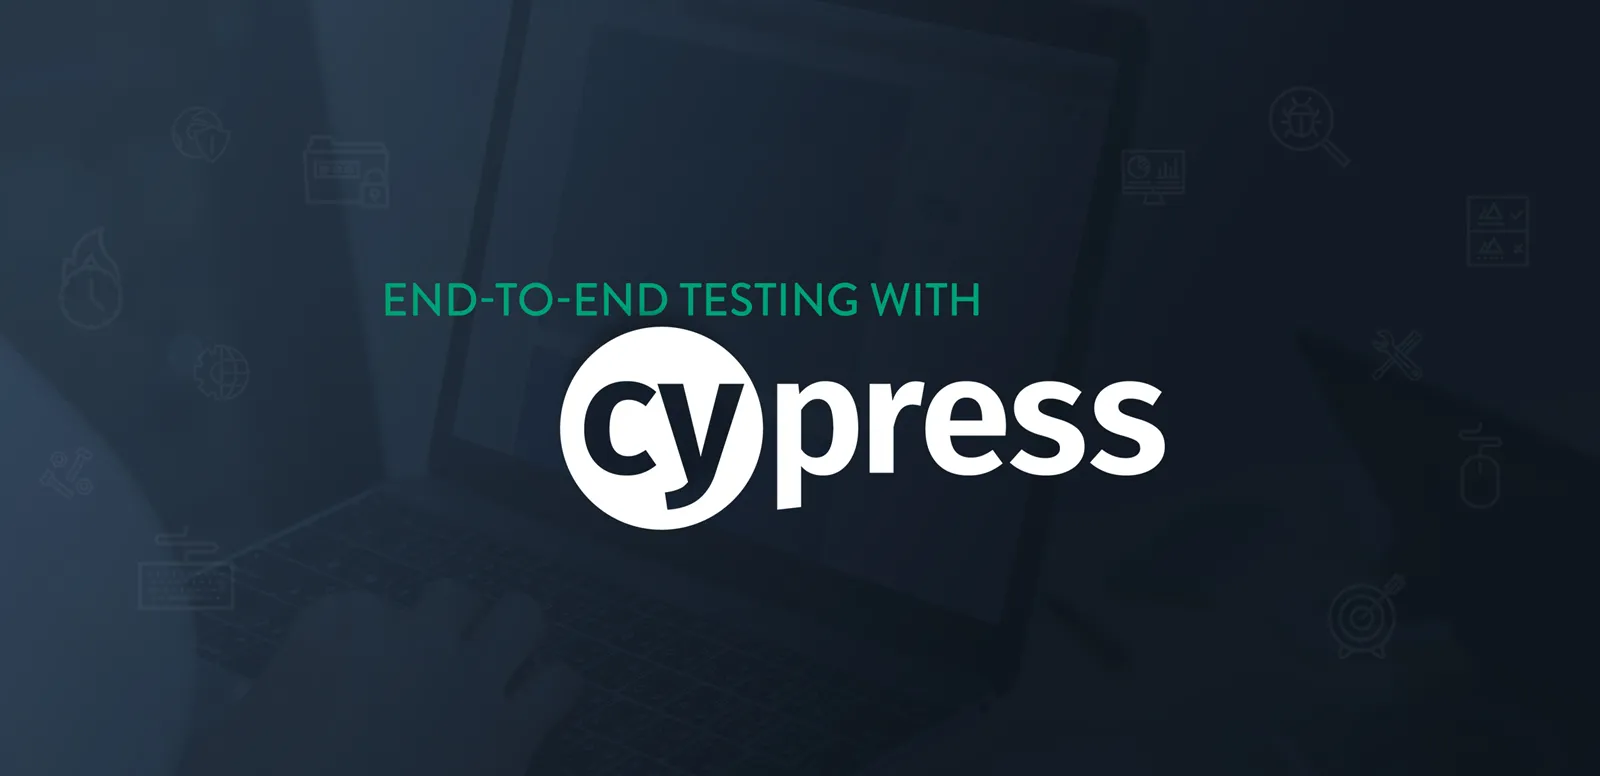
3. Cypress: The E2E Testing Powerhouse
For E2E testing, Cypress is a top choice. It runs directly in the browser, letting you see exactly what your tests are doing.
- Great experience: Cypress’s UI is friendly, with "time travel" debugging to step through your test scenarios.
- Reliable: Cypress automatically waits for elements to appear, reducing flaky tests caused by timing issues.
Let’s Write Some Tests: From Theory to Practice
Let’s look at concrete examples for each type of test.
Example 1: Unit Test with Jest and React Testing Library
Suppose we have a simple Counter component:
// Counter.js
import React, { useState } from 'react'

function Counter() {
  const [count, setCount] = useState(0)

  return (
    <div>
      <h1>Counter</h1>
      <p data-testid="count-display">{count}</p>
      <button onClick={() => setCount(count + 1)}>Increment</button>
      <button onClick={() => setCount(count - 1)}>Decrement</button>
    </div>
  )
}

export default Counter
Now, let’s write tests for it:
// Counter.test.js
import { render, screen, fireEvent } from '@testing-library/react'
import Counter from './Counter'

// Test case 1: Component should render with initial count of 0
test('renders with initial count of 0', () => {
  render(<Counter />)
  const countDisplay = screen.getByTestId('count-display')
  expect(countDisplay).toHaveTextContent('0')
})

// Test case 2: Clicking "Increment" should increase count to 1
test('increments count when increment button is clicked', () => {
  render(<Counter />)
  const incrementButton = screen.getByRole('button', { name: /increment/i })
  fireEvent.click(incrementButton)
  const countDisplay = screen.getByTestId('count-display')
  expect(countDisplay).toHaveTextContent('1')
})

// Test case 3: Clicking "Decrement" should decrease count to -1
test('decrements count when decrement button is clicked', () => {
  render(<Counter />)
  const decrementButton = screen.getByRole('button', { name: /decrement/i })
  fireEvent.click(decrementButton)
  const countDisplay = screen.getByTestId('count-display')
  expect(countDisplay).toHaveTextContent('-1')
})
In this example, we:
- Render the component with
renderfrom React Testing Library. - Find elements on the screen using
screenqueries (e.g.,getByTestId,getByRole). - Simulate user actions with
fireEvent. - Assert the results with Jest’s
expect.
Example 2: Testing an API Call (Integration Test)
Often, your component will call an API to fetch data. We need to "mock" the API call so the test doesn’t depend on a real server.
// UserProfile.js
import React, { useState, useEffect } from 'react'
import axios from 'axios'

function UserProfile({ userId }) {
  const [user, setUser] = useState(null)
  const [loading, setLoading] = useState(true)

  useEffect(() => {
    axios.get(`https://api.example.com/users/${userId}`).then((response) => {
      setUser(response.data)
      setLoading(false)
    })
  }, [userId])

  if (loading) {
    return <div>Loading...</div>
  }

  return (
    <div>
      <h1>{user.name}</h1>
      <p>{user.email}</p>
    </div>
  )
}
And the test:
// UserProfile.test.js
import { render, screen, waitFor } from '@testing-library/react'
import axios from 'axios'
import UserProfile from './UserProfile'

jest.mock('axios')

test('fetches and displays user data', async () => {
  const mockUser = { name: 'John Doe', email: 'john.doe@example.com' }
  axios.get.mockResolvedValue({ data: mockUser })
  render(<UserProfile userId="1" />)
  expect(screen.getByText(/loading.../i)).toBeInTheDocument()
  const userName = await screen.findByText('John Doe')
  const userEmail = await screen.findByText('john.doe@example.com')
  expect(userName).toBeInTheDocument()
  expect(userEmail).toBeInTheDocument()
  expect(screen.queryByText(/loading.../i)).not.toBeInTheDocument()
})
Example 3: Testing a Custom Hook with React Testing Library
Custom Hooks are a great way to reuse logic in React. Testing them is important too. Suppose we have a useToggle hook to manage a boolean state.
// hooks/useToggle.js
import { useState, useCallback } from 'react'

export const useToggle = (initialState = false) => {
  const [state, setState] = useState(initialState)
  const toggle = useCallback(() => setState((prevState) => !prevState), [])
  return [state, toggle]
}
To test this hook, we don’t render a UI component, but the hook itself using a special function from React Testing Library called renderHook.
// hooks/useToggle.test.js
import { renderHook, act } from '@testing-library/react'
import { useToggle } from './useToggle'

test('should use initial state', () => {
  const { result } = renderHook(() => useToggle(true))
  expect(result.current[0]).toBe(true)
})

test('should toggle the state', () => {
  const { result } = renderHook(() => useToggle(false))
  const toggleFunction = result.current[1]
  act(() => {
    toggleFunction()
  })
  expect(result.current[0]).toBe(true)
  act(() => {
    toggleFunction()
  })
  expect(result.current[0]).toBe(false)
})
Example 4: Testing Complex Interactions (Form Validation)
Let’s look at a simple login form with validation.
// LoginForm.js
import React, { useState } from 'react'

function LoginForm({ onSubmit }) {
  const [email, setEmail] = useState('')
  const [password, setPassword] = useState('')
  const [error, setError] = useState('')

  const handleSubmit = (e) => {
    e.preventDefault()
    if (!email || !password) {
      setError('Email and password cannot be empty.')
      return
    }
    onSubmit({ email, password })
  }

  return (
    <form onSubmit={handleSubmit}>
      {error && <p style={{ color: 'red' }}>{error}</p>}
      <div>
        <label htmlFor="email">Email</label>
        <input
          id="email"
          type="email"
          value={email}
          onChange={(e) => setEmail(e.target.value)}
        />
      </div>
      <div>
        <label htmlFor="password">Password</label>
        <input
          id="password"
          type="password"
          value={password}
          onChange={(e) => setPassword(e.target.value)}
        />
      </div>
      <button type="submit">Login</button>
    </form>
  )
}
The test will simulate a user filling out the form and submitting it.
// LoginForm.test.js
import { render, screen, fireEvent } from '@testing-library/react'
import LoginForm from './LoginForm'

test('shows an error message if fields are empty on submit', () => {
  render(<LoginForm />)
  const submitButton = screen.getByRole('button', { name: /login/i })
  fireEvent.click(submitButton)
  const errorMessage = screen.getByText(/email and password cannot be empty/i)
  expect(errorMessage).toBeInTheDocument()
})

test('does not show error and calls onSubmit when form is filled correctly', () => {
  const mockOnSubmit = jest.fn()
  render(<LoginForm onSubmit={mockOnSubmit} />)
  const emailInput = screen.getByLabelText(/email/i)
  const passwordInput = screen.getByLabelText(/password/i)
  const submitButton = screen.getByRole('button', { name: /login/i })
  fireEvent.change(emailInput, { target: { value: 'test@example.com' } })
  fireEvent.change(passwordInput, { target: { value: 'password123' } })
  fireEvent.click(submitButton)
  const errorMessage = screen.queryByText(/email and password cannot be empty/i)
  expect(errorMessage).not.toBeInTheDocument()
  expect(mockOnSubmit).toHaveBeenCalledTimes(1)
  expect(mockOnSubmit).toHaveBeenCalledWith({
    email: 'test@example.com',
    password: 'password123',
  })
})
Example 5: End-to-End Testing with Cypress
Now for the most exciting part! E2E testing with Cypress checks the entire app flow from the user’s perspective. Cypress syntax is easy to read and close to natural language.
Suppose we have a simple TODO list app. Users can:
- Visit the page.
- Add a new todo.
- Mark a todo as completed.
- Filter to show only active todos.
Cypress file structure:
Cypress test files are usually in the cypress/e2e folder.
// cypress/e2e/todo_app.cy.js

describe('Todo Application', () => {
  beforeEach(() => {
    cy.visit('http://localhost:3000') // Replace with your app URL
  })

  it('should allow a user to add a new todo item', () => {
    const newItem = 'Learn Cypress'
    cy.get('[data-testid="todo-input"]').type(newItem)
    cy.contains('Add').click()
    cy.get('[data-testid="todo-list"] li')
      .should('have.length', 1)
      .and('contain', newItem)
  })

  it('should allow a user to mark a todo as completed', () => {
    const newItem = 'Write E2E test'
    cy.get('[data-testid="todo-input"]').type(newItem)
    cy.contains('Add').click()
    cy.contains(newItem).parent().find('input[type="checkbox"]').check()
    cy.contains(newItem).parents('li').should('have.class', 'completed')
  })

  it('should filter todos to show only active ones', () => {
    cy.get('[data-testid="todo-input"]').type('Task 1')
    cy.contains('Add').click()
    cy.get('[data-testid="todo-input"]').type('Task 2')
    cy.contains('Add').click()
    cy.contains('Task 1').parent().find('input[type="checkbox"]').check()
    cy.contains('Active').click()
    cy.get('[data-testid="todo-list"] li').should('have.length', 1)
    cy.contains('Task 2').should('be.visible')
    cy.contains('Task 1').should('not.exist')
  })
})
How to run Cypress tests:
- Open your terminal in the project folder.
- Run:
npx cypress open - The Cypress Test Runner UI will appear—just select a test file to run and watch it execute in the browser!
Conclusion: Testing in React Is Not Optional
Testing in React isn’t an extra task—it’s an inseparable part of professional development. By applying the testing pyramid and using powerful tools like Jest, React Testing Library, and Cypress, you can build apps that are not only feature-rich but also extremely stable and reliable.
Start with small unit tests for your components, gradually move to integration tests, and finally add critical E2E scenarios. Investing time in testing today saves you time and effort fixing bugs tomorrow.
Good luck on your journey to building amazing React apps!
![[React Basics] Guide to Setting Up a React Development Environment](/images/blog/how-to-set-up-a-react-development-environment.webp)
![[React Basics] The key Attribute in React: Understand and Use It Effectively](/images/blog/key-attribute-in-react.webp)
![[React Basics] How to Use the Profiler in React DevTools to Optimize Performance](/images/blog/how-to-use-profiler-in-react-devtools.webp)
![[React Basics] Optimizing Fetch API in React: Handling Asynchronous Data](/images/blog/fetch-api-in-react.webp)