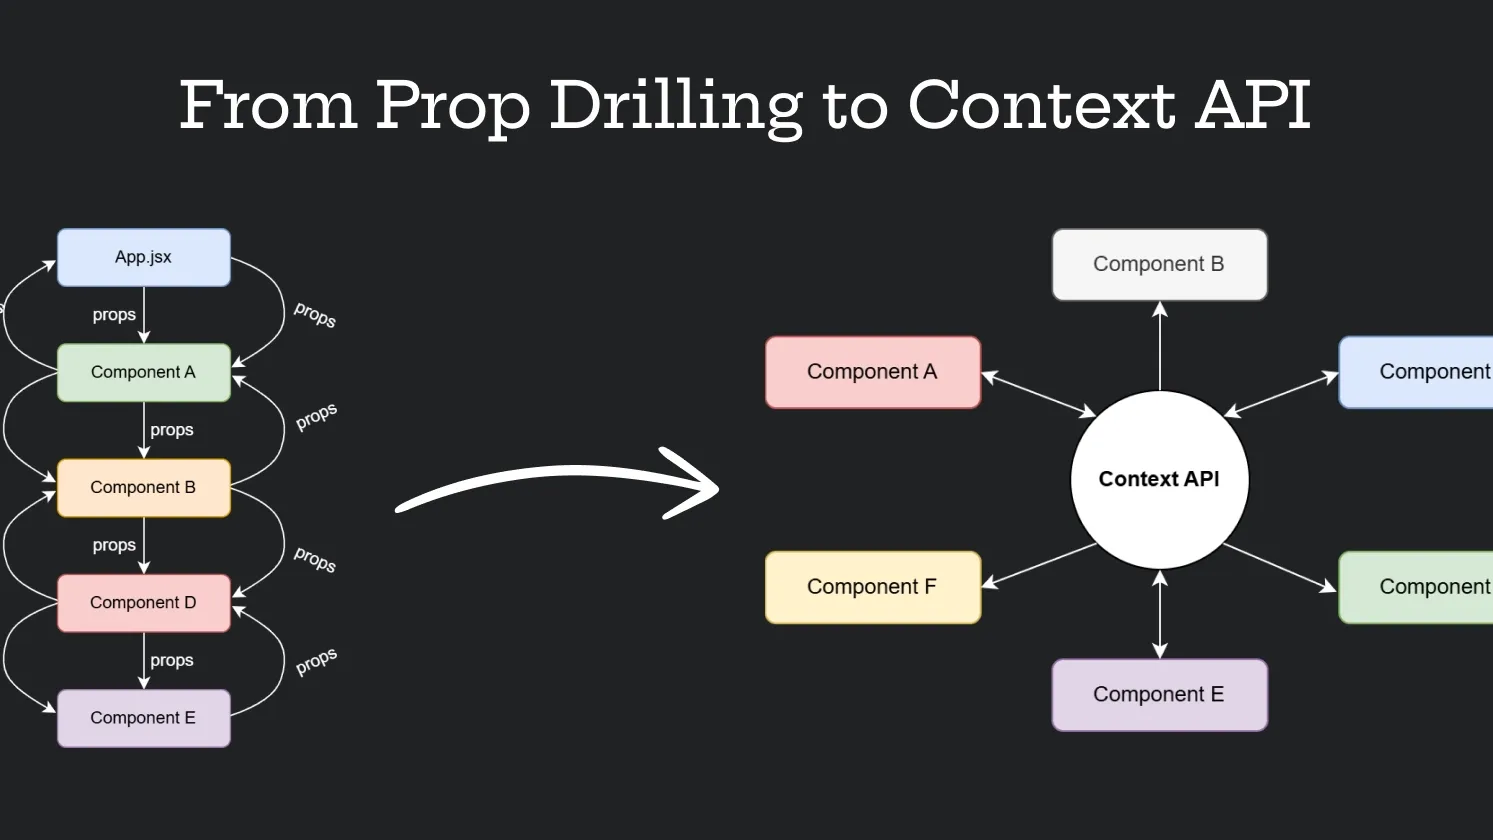
If you've ever worked with React, you've probably had to "hunch over" passing a prop through dozens of component levels, even though the intermediate components don't need it. This experience, humorously called "prop drilling" by the developer community, is truly a nightmare. Code becomes hard to read, hard to maintain, and prone to bugs.
But don't worry, React has given us a savior: React Context.

In this article, we'll thoroughly "dissect" React Context: what it is, why it exists, how to use it effectively, and when you should (and shouldn't) use it. Get ready to say goodbye to prop drilling!
1. What is React Context? The Simplest Explanation 🎯
Imagine your component tree as an apartment building. Prop drilling is like living on the 20th floor and wanting to send an item to someone on the 1st floor, but you have to ask each person on floors 19, 18, 17, ... to pass it down. Very inconvenient!
React Context creates an "elevator system" for your data. You just put the item (data) in the elevator on the 20th floor (Provider), and anyone on any floor (Consumer) with the key can get it, without going through all the intermediate floors.

Official definition: React Context provides a way to pass data through the component tree without having to pass props down manually at every level.
In other words, it creates a "global state" for a group of components, allowing them to share data easily.
2. The Building Blocks of React Context 🧩
To use Context, you need to know 3 main concepts:
-
React.createContext():- This function "initializes" a new Context.
- It returns a Context object, which includes two important parts:
ProviderandConsumer. - You can provide a
defaultValue, which will be used if a component doesn't find aProviderabove it in the tree.
// theme-context.js import React from 'react' // Create a Context with default value 'light' const ThemeContext = React.createContext('light') export default ThemeContext -
Context.Provider:- This is the "broadcast station." Any component wrapped in the
Provider(and its descendants) can "listen" to the data theProviderbroadcasts. Providertakes a key prop:value. This is the data you want to share.
// App.js import ThemeContext from './theme-context' import Toolbar from './Toolbar' function App() { const theme = 'dark' // The data we want to share return ( <ThemeContext.Provider value={theme}> <Toolbar /> </ThemeContext.Provider> ) } - This is the "broadcast station." Any component wrapped in the
-
useContext(Context):- This is the modern and most popular way to "consume" or "listen to" data from a
Provider. - Just call the
useContexthook and pass in the Context object you created. This hook returns the nearestProvider'svalueabove it.
// ThemedButton.js import React, { useContext } from 'react' import ThemeContext from './theme-context' function ThemedButton() { const theme = useContext(ThemeContext) // 'theme' will get the value 'dark' return ( <button style={{ background: theme === 'dark' ? '#333' : '#FFF', color: theme === 'dark' ? '#FFF' : '#333', }} > I am a {theme} button </button> ) } - This is the modern and most popular way to "consume" or "listen to" data from a
3. Real-World Example: Light/Dark Mode Toggle 💡
That's the theory, now let's build a complete example to see the power of Context.
Step 1: Create Context
Create a file to manage the theme.
// src/contexts/ThemeContext.js
import React, { createContext, useState } from 'react'

// 1. Initialize Context
export const ThemeContext = createContext()

// 2. Create Provider Component (best practice)
export const ThemeProvider = ({ children }) => {
  const [theme, setTheme] = useState('light')

  const toggleTheme = () => {
    setTheme((prevTheme) => (prevTheme === 'light' ? 'dark' : 'light'))
  }

  // 3. Pass state and state-changing function via the "value" prop
  const value = {
    theme,
    toggleTheme,
  }

  return <ThemeContext.Provider value={value}>{children}</ThemeContext.Provider>
}
Step 2: Wrap the App with Provider
In App.js or your root file, wrap your components with ThemeProvider.
// src/App.js
import React from 'react'
import { ThemeProvider } from './contexts/ThemeContext'
import HomePage from './components/HomePage'

function App() {
  return (
    <ThemeProvider>
      <HomePage />
    </ThemeProvider>
  )
}

export default App
Step 3: Use the Data Anywhere
Now, any child component inside HomePage can access theme and toggleTheme easily.
// src/components/Navbar.js
import React, { useContext } from 'react'
import { ThemeContext } from '../contexts/ThemeContext'

const Navbar = () => {
  const { theme, toggleTheme } = useContext(ThemeContext)

  return (
    <nav
      style={{
        background: theme === 'dark' ? '#222' : '#eee',
        padding: '1rem',
      }}
    >
      <span>My App</span>
      <button onClick={toggleTheme}>
        Switch to {theme === 'light' ? 'Dark' : 'Light'} Mode
      </button>
    </nav>
  )
}

export default Navbar
As you can see, Navbar doesn't need to receive any theme-related props. It gets the data directly from Context. Clean and efficient!
4. When Should and Shouldn't You Use React Context? 🤔
Context is powerful, but it's not a "silver bullet" for all state management problems.
✅ Use it when:
- Global data, infrequently changing: Great for things like logged-in user info, UI theme, or site language.
- Avoiding Prop Drilling: This is its main purpose. If you find yourself passing props through 2-3+ levels, consider Context.
- Simple state management: For small to medium apps, Context with
useStateoruseReduceris a great solution without external libraries.
❌ Don't use it when:
- Rapidly changing state: For example, the state of input fields in a complex form. Every time the Context value changes, all consumers re-render, which can cause serious performance issues.
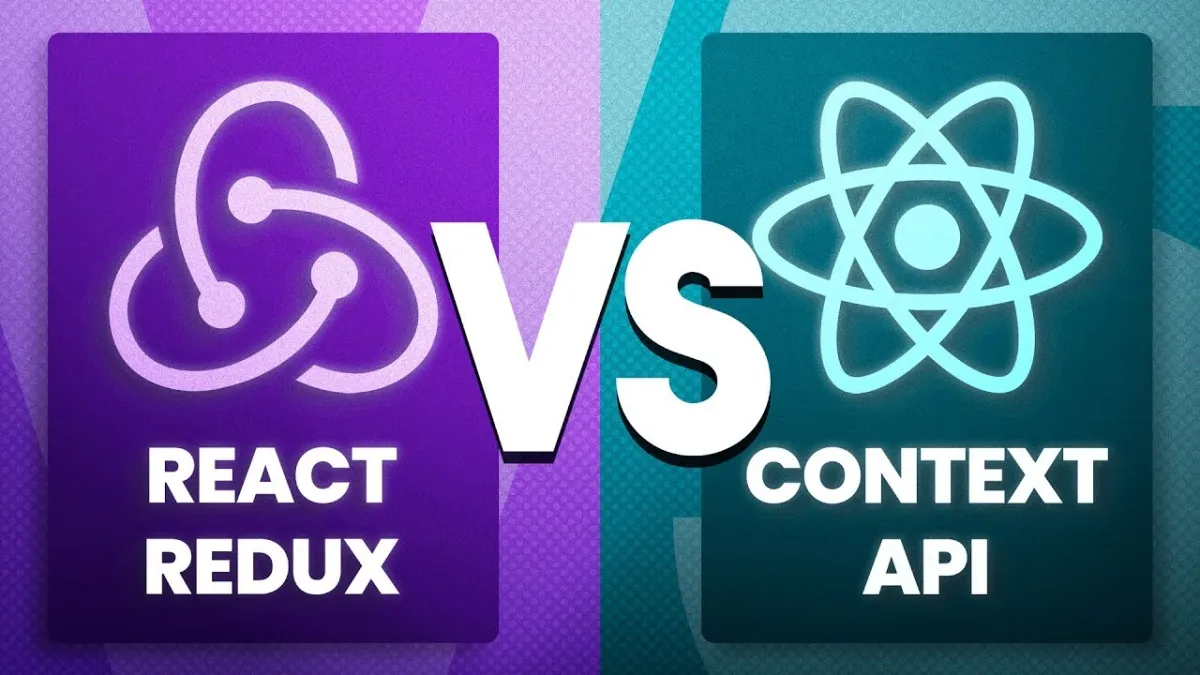
- Replacing dedicated state management libraries (Redux, Recoil, Zustand, ...): React Context lacks powerful tools like Redux DevTools, middleware, or advanced optimizations. For large apps with complex data flows, these libraries are still better choices.
5. React Context vs. Redux: The Classic Showdown ⚔️
This is the eternal question for React developers.

| Criteria | React Context | Redux |
|---|---|---|
| Purpose | Solves "prop drilling" problems. | Manages complex, predictable state. |
| Complexity | Simple, built into React. | More complex, requires library, many concepts (actions, reducers, store, ...). |
| Use case | Global, infrequently changing data (theme, user auth). | Large apps, frequently changing state, complex data flows. |
| Performance | Can cause unnecessary re-renders if not optimized. | Highly optimized, only re-renders affected components. |
| Tools | No dedicated debugging tools. | Redux DevTools is extremely powerful for tracking and debugging state. |
Context is not Redux's enemy. They're different tools for different problems. Many large apps use both: Context for static global data, Redux for complex dynamic app state.
6. Optimizing Performance with React Context 🚀
To avoid the performance issues mentioned, remember these techniques:
-
Split Contexts: Instead of one huge Context, create small, specialized ones. For example: separate
ThemeContext,AuthContext. This ensures that when auth data changes, components only interested in theme won't re-render. -
Use
React.memo: Wrap child components that consume Context withReact.memoto prevent them from re-rendering if their props don't change, even if the parent Context re-renders. -
Use
useMemofor thevalueprop: When passing an object or array to the Provider'svalueprop, wrap it inuseMemoto ensure the object isn't recreated on every render, preventing unnecessary re-renders for all consumers.// Optimized Provider const value = useMemo( () => ({ theme, toggleTheme, }), [theme], ) // Only recreate object when 'theme' changes return ( <ThemeContext.Provider value={value}>{children}</ThemeContext.Provider> )
Conclusion: React Context is a Super Useful Tool
React Context is truly a powerful and handy tool, built right into React, that thoroughly solves the annoying "prop drilling" problem. By understanding how it works, its ideal use cases, and optimization techniques, you can write cleaner, more maintainable, and better-structured React code.
Confidently apply React Context to your next projects and enjoy the freedom of never having to "drill" props again!
![[React Basics] State in React: Concepts, Usage, and Detailed Examples](/images/blog/state-in-react-thumbnail.webp)
![[React Basics] useState Hook: How to Manage State Effectively in React](/images/blog/react-usestate-hook.webp)
![[React Basics] Props in React: Concepts, Usage and Real-world Examples](/images/blog/props-in-react-thumbnail.webp)
![[React Basics] React Handling Events: Effective and Optimal Approaches](/images/blog/react-handling-events.webp)