In today’s modern software development world, Docker has become an indispensable technology, revolutionizing the way we build, ship, and run applications. But did you know that at the heart of this revolution are two core concepts: Image and Container? Although often mentioned together, they play distinct but inseparable roles.

This article will take you on a comprehensive journey, from basic concepts to practical examples, helping you fully decode this pair and understand why they are so important.
What are Docker Images and Containers?
To make it easier to visualize, imagine you are baking a cake.
-
Docker Image is like the recipe. It’s a detailed, immutable (read-only) blueprint containing everything needed to make the cake: the list of ingredients (source code, libraries, dependencies), the steps (installation commands), and the required environment (minimal OS). Once written, the recipe cannot be changed.
-
Docker Container is the cake made from that recipe. It’s a live entity, a running instance of the Image. From one recipe (Image), you can make countless identical cakes (Containers). Each cake is an isolated environment, containing the application and ready to be "enjoyed" (used).
Another analogy in programming: Image is a Class, and Container is an instance (object) of that Class.
Detailed Comparison: Core Differences
Here’s a comparison table of Docker Image and Container by criteria:
| Criteria | Docker Image | Docker Container |
|---|---|---|
| Nature | A static, read-only template | A live, running instance |
| State | Immutable | Mutable, stateful |
| Function | Packages the application and its dependencies | Executes the application in an isolated environment |
| Created from | Built from a Dockerfile or committed from a container | Started from a Docker Image |
| Storage | Exists as files in a Docker registry (like Docker Hub) or locally | Exists in memory and CPU when running, can be deleted |
Structure of a Docker Image: The Power of Layers
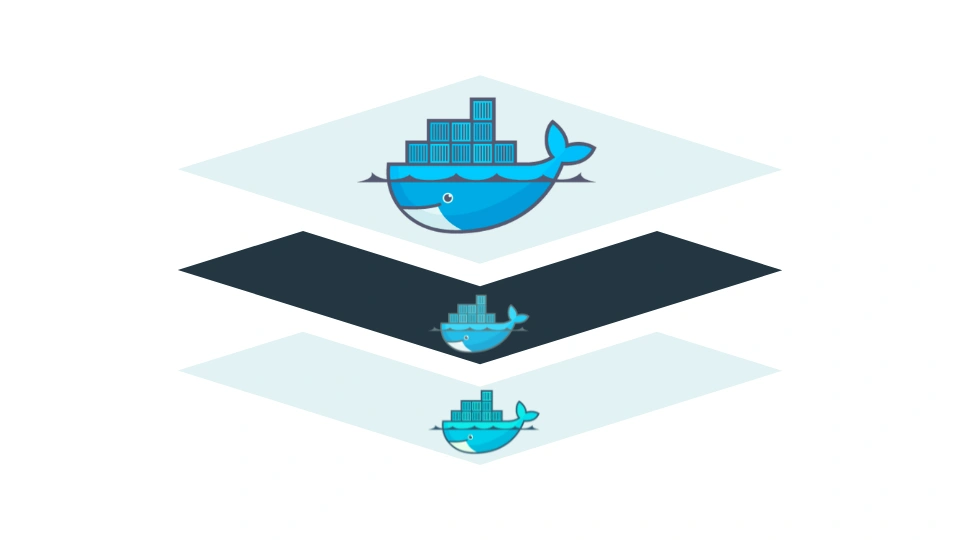
What makes Docker Images efficient and flexible is their layered architecture. Each instruction in the Dockerfile (the text file containing build instructions) creates a new layer.

Imagine stacking transparent glass sheets. Each sheet is a layer, containing a specific change (e.g., installing a library, copying source code). Looking through all the layers, you see the complete application.
Benefits of the layer structure:
- Reuse and Space Saving: If multiple Images use the same base layer (e.g., Ubuntu OS), Docker stores that layer only once.
- Faster Builds: When rebuilding an Image, Docker uses cache. It only rebuilds layers that have changed, saving significant time.
- Efficient Version Management: Updating the app is as simple as adding or replacing a few top layers, without rebuilding everything from scratch.
Docker Container Lifecycle
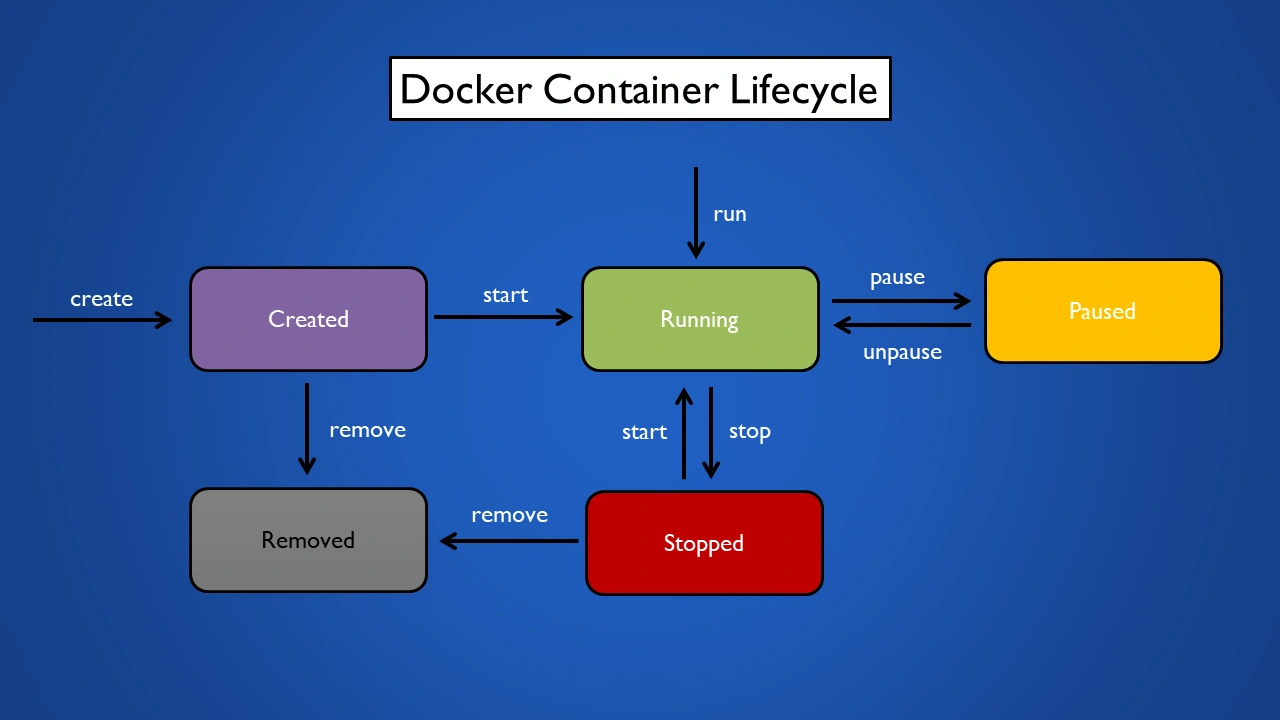
A Container is not just "running" or "stopped". It has a clear lifecycle with different states, managed by corresponding Docker commands.

-
Created: The container is created from an Image but not yet started. Like preparing everything but not turning on the oven.
- Command:
docker create <image_name>
- Command:
-
Running: The container is active and the application inside is executing.
- Command:
docker start <container_id_or_name>ordocker run <image_name>(runcombinescreateandstart).
- Command:
-
Paused: All processes inside the container are "frozen". Useful for temporarily suspending activity without losing state.
- Command:
docker pause <container_id_or_name> - To resume:
docker unpause <container_id_or_name>
- Command:
-
Stopped: The container has stopped running. All main processes have ended, but its file system is still stored. You can restart it later.
- Command:
docker stop <container_id_or_name>
- Command:
-
Deleted: The container is completely removed from the system, freeing resources. You cannot recover a deleted container.
- Command:
docker rm <container_id_or_name>
- Command:
Practical Example: "Dockerizing" a Simple Node.js App
Let’s see how Images and Containers work together in a real example. Suppose we have a simple Node.js web server app.
Step 1: Prepare the app
Create a project folder with two files inside:
server.js: The app’s source code.package.json: Declares info and dependencies.
Step 2: Write the Dockerfile (the recipe)
Create a file named Dockerfile in the same folder with the following content:
# Step 1: Choose a base Image
FROM node:18-alpine

# Step 2: Create a working directory inside the Image
WORKDIR /app

# Step 3: Copy package.json and install dependencies
COPY package*.json ./
RUN npm install

# Step 4: Copy all source code
COPY . .

# Step 5: Expose port 8080 for external access
EXPOSE 8080

# Step 6: Command to run the app when the Container starts
CMD [ "node", "server.js" ]
This Dockerfile is the detailed recipe to create the Image for our app.
Step 3: Build the Image (create the blueprint)
Open a terminal in the project folder and run:
docker build -t my-nodejs-app .
Docker will read the Dockerfile, execute each step to create layers, and finally create a new Image named my-nodejs-app.
Step 4: Run the Container (make the cake)
Now, from the created Image, we’ll start a Container:
docker run -p 3000:8080 -d --name my-running-app my-nodejs-app
-p 3000:8080: Maps port 3000 on your machine to port 8080 inside the container.-d: Runs the container in detached mode.--name my-running-app: Names the container.
Now you have a finished cake—a Node.js app running in isolation inside a container. You can access http://localhost:3000 in your browser to see the result. From the same my-nodejs-app Image, you can create multiple containers if you wish.
Conclusion: Image and Container are "core" concepts
Image and Container are two sides of the same coin in the Docker ecosystem. Images provide an immutable blueprint, packaging everything needed for the app, ensuring consistency across environments. Containers are the living embodiment of that blueprint, offering a lightweight, isolated, and flexible runtime environment.
Understanding this "template and instance" relationship is not only the foundation for mastering Docker but also opens the door to building and deploying modern applications more efficiently, quickly, and reliably than ever before.
![[Docker Basics] What is Docker Compose? Importance and Effective Usage](/images/blog/what-is-docker-compose.webp)
![[Docker Basics] A Simple and Effective Guide to Building Docker Images](/images/blog/how-to-build-docker-image.webp)
![[Docker Basics] Step-by-Step Guide to Installing Docker on Windows, macOS, and Linux](/images/blog/how-to-install-docker-on-operating-systems.webp)
![[Docker Basics] Essential Commands to Run Docker Containers](/images/blog/how-to-run-docker-container-thumbnail.webp)