In the world of programming with Git, git merge is like an intersection where branches of history meet and create a new common point. It’s safe, easy to understand, and records everything truthfully. But sometimes, that truthfulness creates a messy, complex, and hard-to-follow commit history.
To use another analogy, if git merge is a diligent historian, then git rebase is a skillful director, allowing you to "cut, splice, and rearrange" scenes (commits) to create a smoother, cleaner, and more understandable story (commit history).
This article will help you master the powerful git rebase tool.
1. Core Concept: What is Git Rebase? 🌿
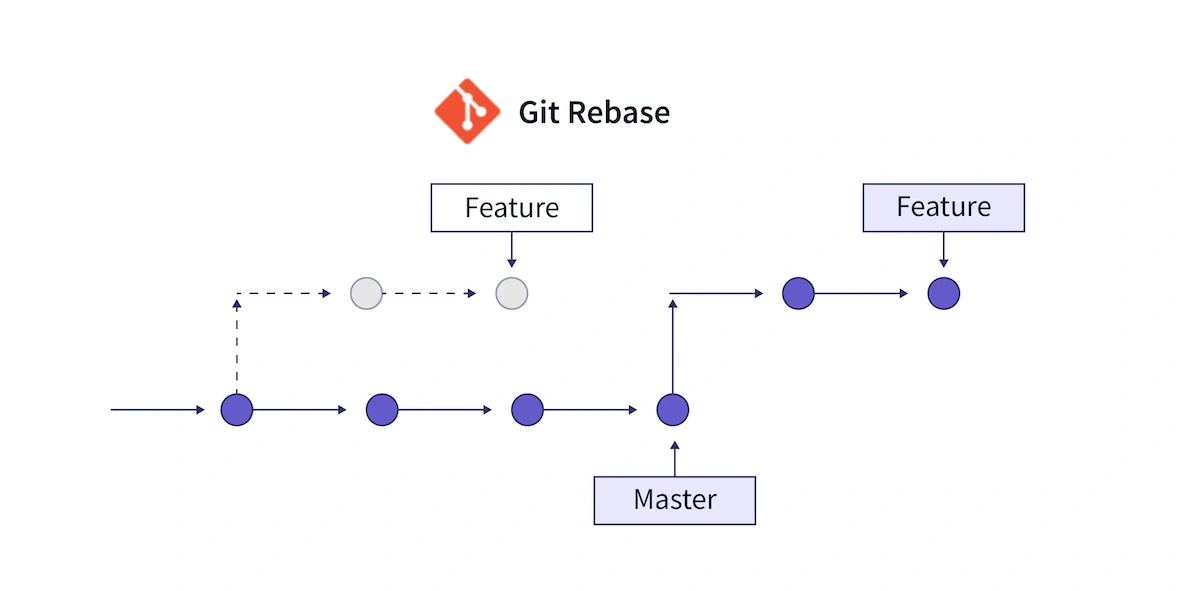
Basically, Git Rebase is the process of moving or combining a sequence of commits to a new base commit.
Imagine you have a main branch (main) and you create a new branch (feature) to develop a feature. While you’re working on feature, the main branch receives new commits from other team members.
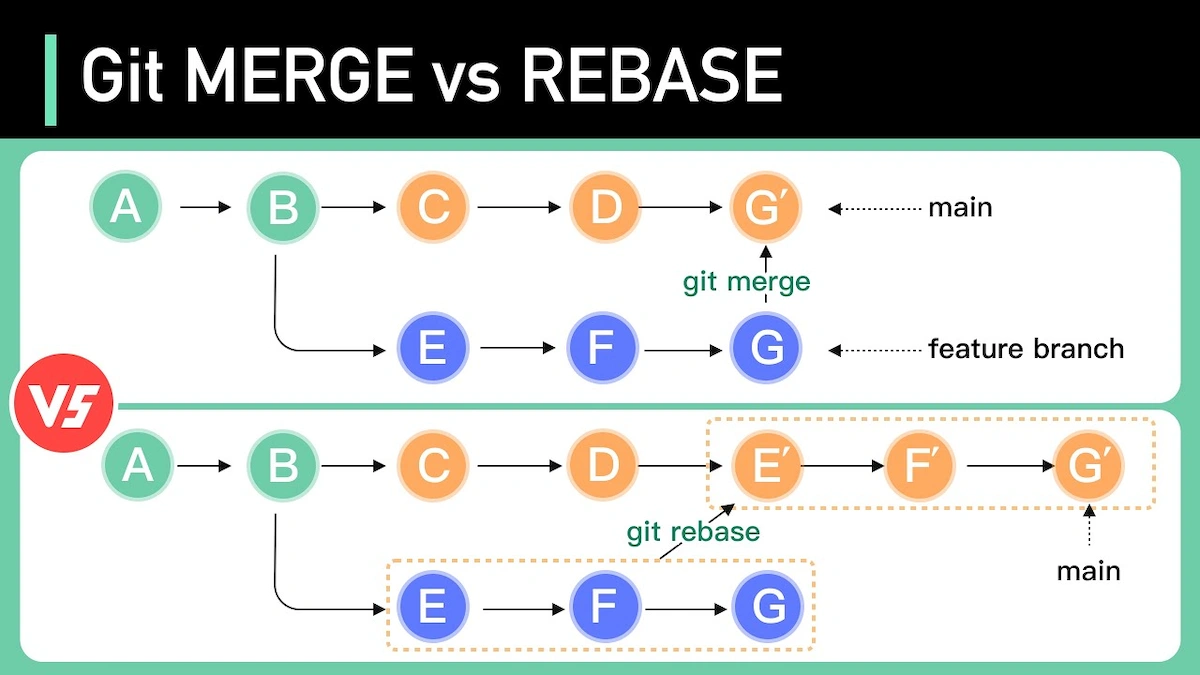
At this point, your history looks like a branching tree. You have two options to update your feature branch with the latest changes from main:
git merge main: Git will create a new "merge commit" on thefeaturebranch. This commit has two parents: the last commit offeatureand the last commit ofmain. It’s like tying two branches together. The history records exactly when this merge happened.git rebase main: Here’s where the magic happens. Instead of creating a merge commit, Rebase will:- Temporarily "lift" all the commits you made on the
featurebranch. - Move the
featurebranch pointer to the latest commit ofmain. - Replay each commit you "lifted" onto the top of
main.
- Temporarily "lift" all the commits you made on the
The result? The commit history on your feature branch now looks as if you just created it from the latest commit of main. It becomes a straight, clean, and seamless line.
Simple analogy: Think of
mainas the trunk of a tree. Yourfeaturebranch grows from point A on the trunk. When the trunk grows taller to point B,rebaseis like carefully "transplanting" yourfeaturebranch to point B. Your branch keeps all its leaves (commits) but now grows from the newest position on the trunk.
2. Why Use Git Rebase? 🚀
Keeping a "straight and clean" commit history isn’t just about aesthetics. It brings very practical benefits:
- Easier to read and understand: A linear history helps anyone (including your future self) easily read and understand the project’s development flow without being confused by tons of meaningless merge commits.
- More effective debugging: When tracking down a bug, tools like
git bisectwork much better on a linear history. - Easier code review: When you create a Pull Request (Merge Request), reviewers see a neat chain of commits, each making a logical change. This makes it easier for them to follow and give feedback.
- Removes "noise": Rebase helps eliminate unnecessary commits like "Merge branch 'main' into feature".
3. Basic Usage of Git Rebase
The most common scenario is updating your feature branch with the latest changes from the main branch.
Steps:
- First, make sure your local
mainbranch is up to date:
git checkout main
git pull origin main
- Switch to your
featurebranch:
git checkout feature
- Perform the rebase:
git rebase main
Handling Conflicts:
During the rebase, Git will replay each of your commits. If one of those commits changes the same line of code that a commit on main has also changed, a conflict will occur.
Don’t panic! Git will pause the rebase and tell you which files are in conflict.
- Open the conflicted files and fix them. You need to remove the
<<<<<<<,=======,>>>>>>>markers and choose the final code you want to keep. - After fixing, add the resolved files to the staging area:
git add <fixed-file-name> - Continue the rebase:
git rebase --continue - If you get stuck and want to go back to the state before the rebase, use:
git rebase --abort
4. The Ultimate Power: Git Interactive Rebase 💡
This is the real "hidden gem" of rebase. Interactive rebase gives you full control to edit your commit chain before applying them.
Basic command: git rebase -i <base-commit>
For example, you want to clean up the last 5 commits on your branch. You can use HEAD~5:
git rebase -i HEAD~5
A text file will open in your editor, listing those 5 commits, each starting with pick.
pick a1b2c3d Add feature A - part 1
pick f4e5d6c Minor fix
pick 9h8g7f6 Add tests for A
pick c1b2a3d Fix typo
pick e5f6g7h Complete feature A
Now you can change pick to other commands to "rewrite history":
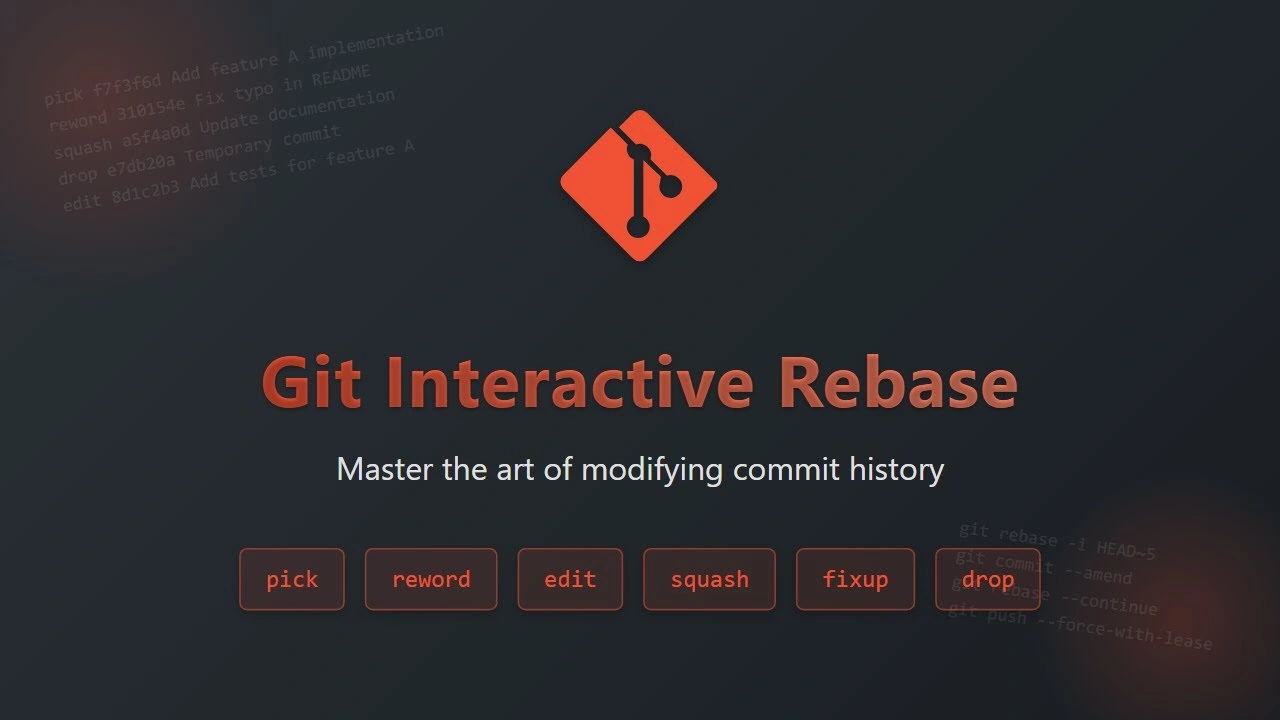
reword(orr): Keep the commit but edit the commit message.edit(ore): Stop at this commit so you can edit the code (e.g.,git commit --amend).squash(ors): Combine this commit into the one above it. Git will open a new editor for you to write a new commit message for the combined commit. This is very useful for merging small, trivial commits ("fix typo", "wip",...) into a single meaningful commit.fixup(orf): Similar tosquash, but discards this commit’s message and keeps only the message of the commit above.drop(ord): Completely remove this commit.- You can also reorder the lines to rearrange the commits.
Cleanup example:
pick a1b2c3d Add feature A - part 1
squash 9h8g7f6 Add tests for A       # Merge test commit into "part 1"
squash e5f6g7h Complete feature A    # Merge the completion commit too
drop f4e5d6c Minor fix               # Drop unnecessary fix commit
drop c1b2a3d Fix typo                # Drop typo fix commit as well
After saving and closing the file, Git will perform these actions. The result: from 5 messy commits, you now have a single, clean commit with a complete message: "Add feature A".
5. The Golden Rule of Rebase ⚠️
Rebase is a history-rewriting tool. This brings an extremely important, inviolable rule:
NEVER REBASE ON PUBLIC/SHARED BRANCHES.
Branches like main, develop, or any branch that other team members are working on are untouchable.
Why? When you rebase, you’re creating entirely new commits (even if the content is identical) and deleting the old ones. If someone else has cloned or pulled the old branch, their history and yours will diverge. When they try to pull the new code, Git will get "confused", causing huge conflicts and possibly duplicate commits.
Simple rule: Only rebase on your own local branches that you haven’t pushed to remote or that no one else is working on.
When to Use Rebase, When to Use Merge? 🏆
This is the eternal question, and the answer depends on your team’s workflow. However, a common and effective workflow is:
- Use Rebase when:
- Updating your personal feature branch with changes from the main branch (
main/develop). - Cleaning up your local commit history before creating a Pull Request.
- Updating your personal feature branch with changes from the main branch (
- Use Merge when:
- Merging a completed and reviewed feature branch into the main branch (
main/develop). This creates a merge commit, clearly recording that "feature X was merged at time Y".
- Merging a completed and reviewed feature branch into the main branch (
In other words: Rebase to keep the history inside your feature branch clean, and Merge to combine the final result of your feature branch into the shared history.
Conclusion: Git Rebase Isn’t Scary
See? git rebase isn’t as scary as its reputation! It’s an advanced skill that helps you go from someone who "knows how to use Git" to someone who "masters Git". By keeping your commit history clean, linear, and meaningful, you not only help yourself but also your team work more efficiently, with fewer errors, and maintain the project more easily in the long run.
Start practicing on your personal branches, and you’ll quickly realize the power of "rewriting history" with intention.
![[Advanced Git] Git reflog: Recovering commit history and every action in Git](/images/blog/what-is-git-reflog-thumbnail.webp)
![[Advanced Git] Git Reset or Git Revert? Choose the Right Way to Undo](/images/blog/git-reset-or-git-revert-thumbnail.webp)
![[Advanced Git] What is Git cherry-pick? The "Magic" Command for Selective Commits](/images/blog/what-is-git-cherry-pick-thumbnail.webp)
![[Advanced Git] How to Use Git Stash to Handle Unfinished Changes](/images/blog/what-is-git-stash-thumbnail.webp)