Have you ever been in a situation where you are halfway through coding an important feature and your boss suddenly asks you to "fix a critical bug"? Or maybe you are experimenting with a new idea, your code is incomplete, and you need to switch to another branch to review a colleague's code? Your changes are unfinished, not ready to commit, but you can't just discard them. This is when Git Stash shines as your lifesaver. 🦸♂️
So, what is Git Stash?
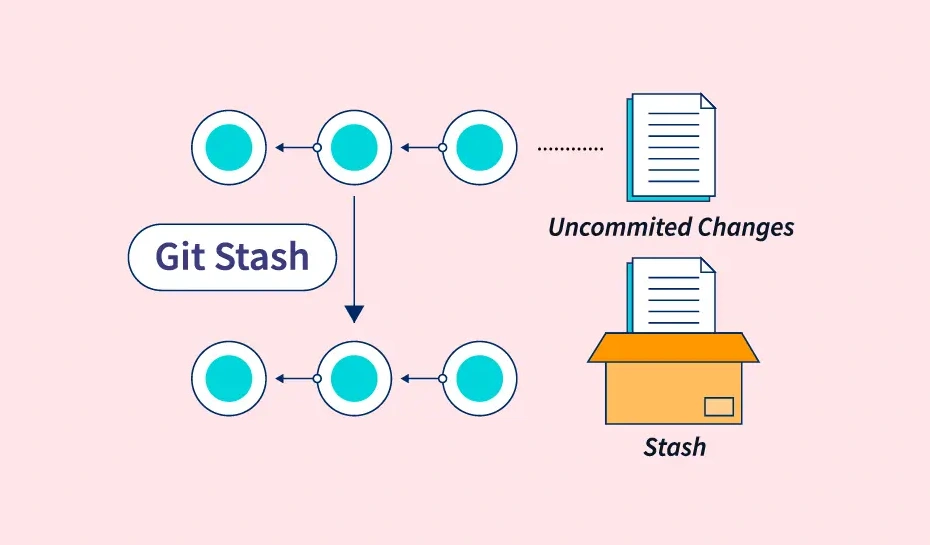
Simply put, git stash is a Git command that allows you to temporarily save your uncommitted changes (both staged and unstaged files) into a hidden "stash". After stashing, your workspace returns to a "clean" state as of the last commit, letting you safely switch branches, pull new code, or do anything else without worrying about conflicts or losing your work. When you're ready, you can easily "pull" those changes back from the stash and continue working.
Imagine you are writing a letter by hand. Suddenly, the doorbell rings and a friend visits. You can't leave the unfinished letter on the table, but it's not done to put in an envelope either. The solution is to temporarily put it in a drawer. git stash works like that drawer for your code.
Why and When Should You Use Git Stash? 🤔
git stash is not just a cool command, it's an extremely useful tool that makes your workflow smoother and more efficient. Here are some common scenarios where you'll love git stash:
- Urgent bug fix: The classic scenario. You're developing a new feature, your code is messy, and a critical bug on the
mainbranch needs immediate fixing. You can't commit unfinished code, but you need to switch tomain.git stashlets you put everything away, switch branches, fix the bug, then come back and restore your work easily. - Context switching: When you need to switch to another branch to review, test, or help a teammate without committing your current changes.
- Updating code from remote: You want to
git pullthe latest code from the server, but you have local changes not yet committed. Pulling directly may cause conflicts. The safest way is to stash your changes, pull the new code, then pop the stash and resolve any conflicts cleanly. - Trying out a wild idea: You want to try a new solution but aren't sure if it will work. Instead of creating a new branch just for testing, you can code directly, then stash it if it doesn't work out.
Step-by-Step Guide to Using Git Stash
Using git stash is very straightforward. Here are the most basic and common commands you need to know.
1. Stash your changes: git stash
This is the most basic command. When you are in your project directory with uncommitted changes, just type:
git stash
Or to add a description to your stash (very useful if you have multiple stashes), use:
git stash save "Working on feature X, need to fix bug Y"
After this command, Git will "clean up" your working directory.
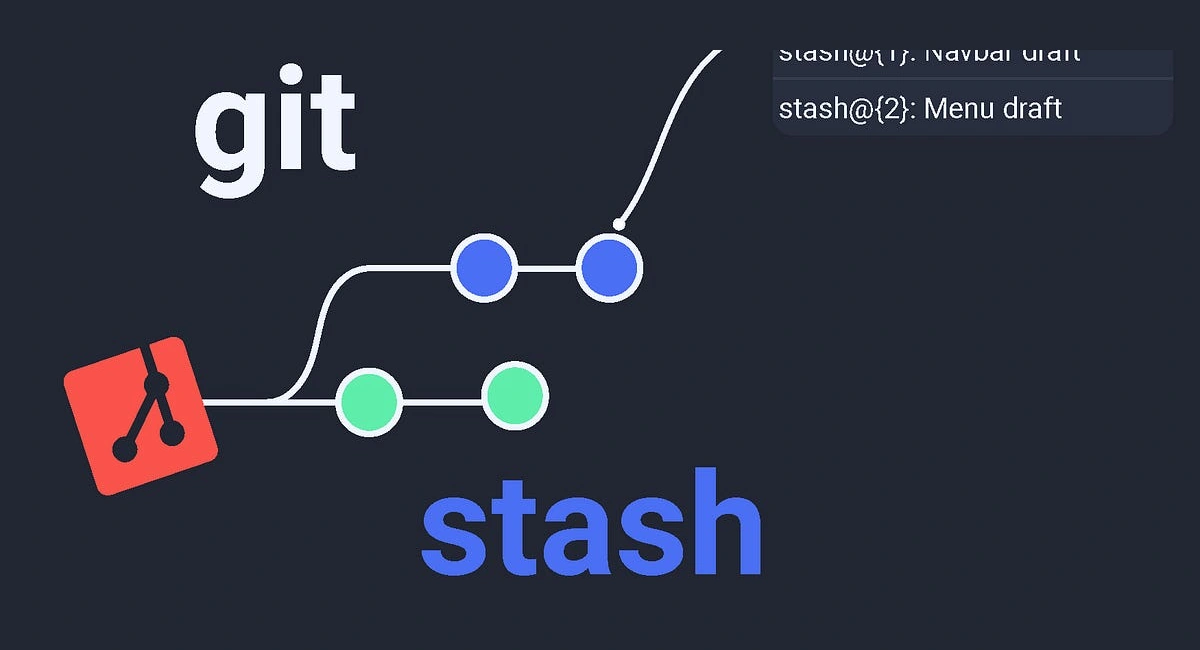
2. List your stashes: git stash list
How many things have you put in the "drawer"? This command will tell you:
git stash list
The result will look like this:
stash@{0}: On feature-branch: Working on feature X, need to fix bug Y
stash@{1}: WIP on main: 4a5de2e Add new feature
Each stash is identified by an index stash@{n}. The newest stash is always stash@{0}.
3. Retrieve the latest changes: git stash pop
When you're ready to continue your unfinished work, use git stash pop. This command does two things:
- Applies the changes from the latest stash (
stash@{0}). - Removes that stash from the list.
git stash pop
Note: If a conflict occurs when popping, the stash will not be deleted automatically. You need to resolve the conflict first, then manually drop the stash.
4. Apply a stash without deleting: git stash apply
If you want to apply a stash but keep it in the list (for example, to apply it to another branch), use git stash apply:
git stash apply
This applies the latest stash. To apply an older stash, specify its identifier:
git stash apply stash@{2}
5. Delete a stash: git stash drop and git stash clear
After applying and confirming you no longer need a stash, you can delete it with git stash drop:
git stash drop stash@{2} # Delete a specific stash
If not specified, the command deletes the latest stash (stash@{0}).
To "clean up" the entire drawer and delete all stashes, use:
git stash clear
Warning: Be careful with this command, as it will delete your entire stash history with no way to undo.
Advanced Options with Git Stash
Besides the basic commands, git stash has some powerful advanced options.
- Stash untracked files: By default,
git stashonly saves tracked files. To stash new (untracked) files as well, add the-uor--include-untrackedflag:git stash -u - Stash ignored files: To stash everything, including files in
.gitignore, use the-aor--allflag:git stash -a - Stash part of a file (Stash patch): This is a very cool feature. If you only want to stash specific changes in a file, not the whole file, use the
-por--patchflag:
Git will go through each change (hunk) and ask if you want to stash it.git stash -p
Conclusion: Git Stash is a Simple but Useful Tool
git stash is a simple yet powerful tool, an essential part of any professional developer's toolkit. It helps you manage your work flexibly, keeps your working directory clean, and reduces risk when you need to switch contexts frequently.
Next time your boss suddenly calls you to "put out a fire", don't panic. Calmly type git stash, smile, and say: "I'm on it!" 😉 Happy mastering Git and writing awesome code!
![[Advanced Git] What is Git Tag? Usage and Real-World Applications](/images/blog/what-is-git-tag-thumbnail.webp)
![[Advanced Git] Git Rebase Guide: Understand and Use Effectively](/images/blog/what-is-git-rebase-thumbnail.webp)
![[Advanced Git] Git Reset or Git Revert? Choose the Right Way to Undo](/images/blog/git-reset-or-git-revert-thumbnail.webp)
![[Advanced Git] What is Git cherry-pick? The "Magic" Command for Selective Commits](/images/blog/what-is-git-cherry-pick-thumbnail.webp)