
Imagine one day you open the Grab app to book a ride, but instead of seeing an intuitive map with moving cars, you only get a dry list of coordinate numbers. You would definitely delete the app immediately!
In the era of on-demand services, Maps are no longer a luxury feature, but a mandatory standard.
In previous articles, we learned how to get raw coordinate numbers (Longitude, Latitude) via expo-location. Today, in this lesson, we will turn those numbers into a wonderful visual experience by plotting them on a digital map using the react-native-maps library.
1. Installing the necessary library
react-native-maps is the gold standard library used by the community to display maps in React Native. It is backed by the Expo community itself, so integration is extremely smooth.
Open your Terminal and run the following command to add the library to your project:
npx expo install react-native-maps
Fun fact about operating systems: By default, this library will display Apple Maps on iPhone/iPad devices, and display Google Maps on Android devices. This helps your application feel as "Native" as possible to the habits of each user base.
2. Initializing your first "Map"
Calling a map onto the screen is so easy it will surprise you. Unlike Web development (where you have to embed iframes or use complex SDKs), in React Native, the map works exactly like a Core Component (like a View or Image tag).
Let's create an app/map.tsx file and enter the following code:
import React from 'react'
import { StyleSheet, View } from 'react-native'
import MapView from 'react-native-maps'

export default function MapScreen() {
  return (
    <View style={styles.container}>
      <MapView
        style={styles.map}
        // Set initial location (Example: Hoan Kiem Lake, Hanoi)
        initialRegion={{
          latitude: 21.0285, // Latitude
          longitude: 105.8542, // Longitude
          latitudeDelta: 0.05, // Vertical map zoom level (Smaller means closer zoom)
          longitudeDelta: 0.05, // Horizontal map zoom level
        }}
      />
    </View>
  )
}

const styles = StyleSheet.create({
  container: {
    flex: 1, // Mandatory so the parent View takes up the whole screen
  },
  map: {
    width: '100%',
    height: '100%', // The map will stretch across the entire screen
  },
})
Note: Any <MapView> tag is required to be given a size property (width, height, or flex: 1). If missing, the map will be invisible!
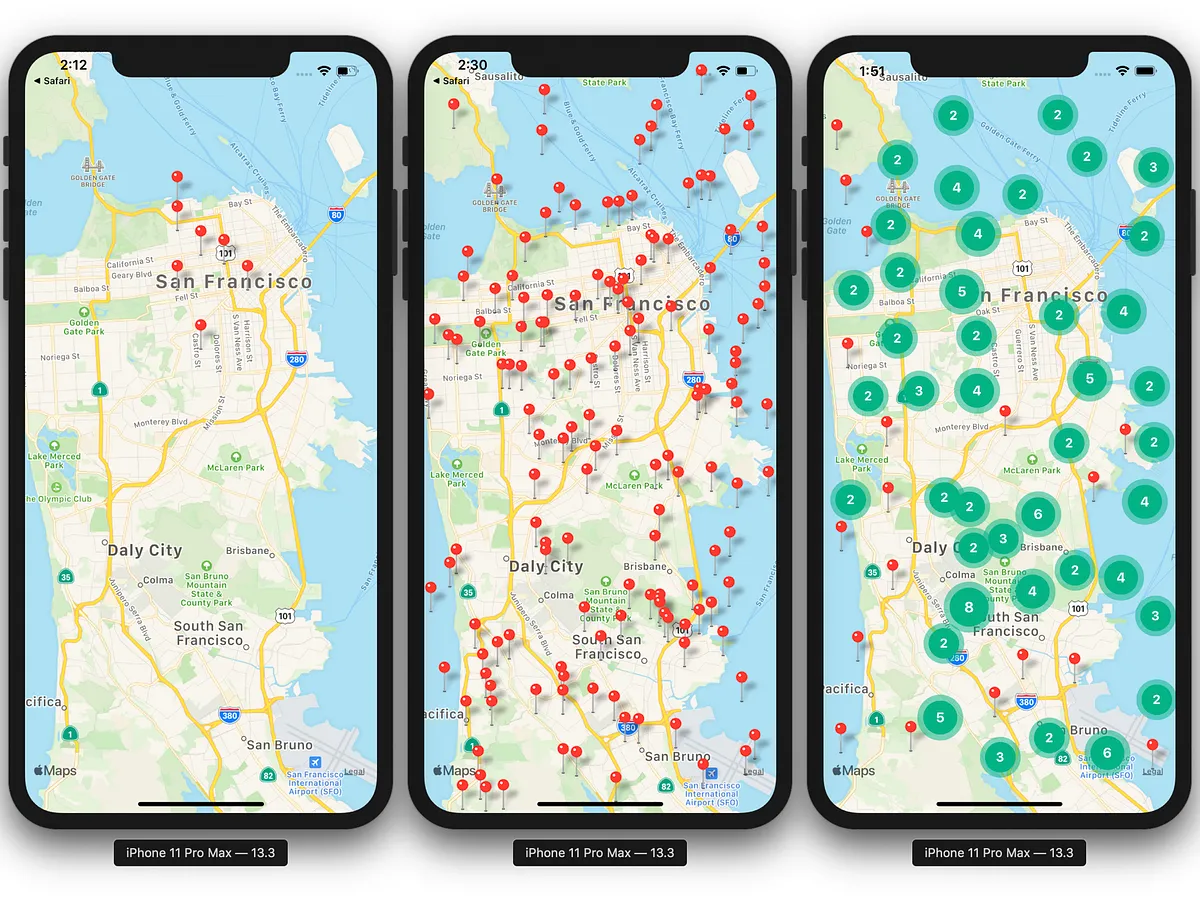
3. Visually pinning locations with Markers
An empty map doesn't mean much. You need to stick "pins" on it to indicate store locations, driver locations, or delivery destinations. We use the Marker component.
The <Marker> tag must always be placed inside (as a child of) the <MapView> tag.
import React from 'react'
import { StyleSheet, View, Text } from 'react-native'
import MapView, { Marker } from 'react-native-maps'

export default function StoreMap() {
  const storeLocation = { latitude: 21.0285, longitude: 105.8542 }

  return (
    <View style={styles.container}>
      <MapView style={styles.map} initialRegion={{ ...storeLocation, latitudeDelta: 0.01, longitudeDelta: 0.01 }}>
        {/* Plant a flag for the store location */}
        <Marker coordinate={storeLocation} title="Central Store" description="Open from 8 AM - 10 PM" />
      </MapView>
    </View>
  )
}

const styles = StyleSheet.create({
  container: { flex: 1 },
  map: { flex: 1 },
})
When the user taps the red pin on the screen, an information box (Callout) will pop up displaying the extremely professional title and description.
4. UI Customization (Dark Mode & Custom Marker)
To design a UI/UX with a modern vibe, you shouldn't use the boring default red pin. react-native-maps allows you to customize everything.
- Change Marker Icon: You just need to pass an
<Image>tag or graphic drawing tags inside the<Marker>. - Enable Dark Mode for the map: If your application has a dark background, a bright map will ruin the visual experience. You can pass a JSON array of color formats to the
customMapStyleproperty.
<Marker coordinate={storeLocation}>
  {/* Replace red pin with a custom Icon, prioritizing flat graphic style */}
  <View style={{ backgroundColor: '#2d3436', padding: 8, borderRadius: 20 }}>
    <Text style={{ color: '#fff', fontWeight: 'bold' }}>📍 MAIN</Text>
  </View>
</Marker>
5. Integrating GPS: Displaying Real-time location
Now is the time for us to pair the knowledge from the expo-location lesson into this map.
Goal: Open the app, automatically request permission, get the current GPS coordinates, and move the map right to where you are standing.
import React, { useState, useEffect } from 'react'
import { View, StyleSheet, ActivityIndicator, Text } from 'react-native'
import MapView, { Marker } from 'react-native-maps'
import * as Location from 'expo-location'

export default function LiveMapScreen() {
  const [myLocation, setMyLocation] = useState(null)
  const [errorMsg, setErrorMsg] = useState(null)

  useEffect(() => {
    ;(async () => {
      // 1. Request GPS permission
      let { status } = await Location.requestForegroundPermissionsAsync()
      if (status !== 'granted') {
        setErrorMsg('Cannot display the map due to lack of GPS permission.')
        return
      }

      // 2. Get current coordinates
      let location = await Location.getCurrentPositionAsync({})
      setMyLocation({
        latitude: location.coords.latitude,
        longitude: location.coords.longitude,
        latitudeDelta: 0.01,
        longitudeDelta: 0.01,
      })
    })()
  }, [])

  // If waiting for GPS, show loading
  if (!myLocation && !errorMsg) {
    return (
      <View style={styles.center}>
        <ActivityIndicator size="large" color="#0984e3" />
        <Text>Searching for GPS satellites...</Text>
      </View>
    )
  }

  // If there's a permission denial error
  if (errorMsg) {
    return (
      <View style={styles.center}>
        <Text style={{ color: 'red' }}>{errorMsg}</Text>
      </View>
    )
  }

  // Done: Draw the map
  return (
    <View style={styles.container}>
      <MapView
        style={styles.map}
        region={myLocation} // Use region instead of initialRegion so the map automatically moves when myLocation changes
        showsUserLocation={true} // Turn on the blue dot showing phone orientation (Native feature)
        showsMyLocationButton={true} // Turn on the button to automatically center back
      >
        {/* You can plant other Markers here */}
      </MapView>
    </View>
  )
}

const styles = StyleSheet.create({
  container: { flex: 1 },
  map: { flex: 1 },
  center: { flex: 1, justifyContent: 'center', alignItems: 'center' },
})
6. Important notes upon Deployment
Running maps on the Expo Go app (while coding) is very smooth because Expo has pre-configured everything. However, when you package your app (Build App) to push to the Google Play Store or Apple App Store, the map might encounter a "White screen" error.
To fix this, you MUST generate a Google Maps API Key (free) from the Google Cloud Console and insert it into the project's app.json file.
The configuration in app.json will look like this:
{
  "expo": {
    "ios": {
      "bundleIdentifier": "com.yourcompany.app",
      "config": {
        "googleMapsApiKey": "YOUR_IOS_API_KEY"
      }
    },
    "android": {
      "package": "com.yourcompany.app",
      "config": {
        "googleMaps": {
          "apiKey": "YOUR_ANDROID_API_KEY"
        }
      }
    }
  }
}
Conclusion: Mastering "billion-dollar technology"
An intuitive interface defines the class of an application. By combining react-native-maps and expo-location, you have grasped the core technology of billion-dollar platforms.
- Initialize
<MapView>withflex: 1to display the map. - Use
<Marker>to pinpoint notable spots. - Always get GPS permission before using the
showsUserLocationproperty.
See you in the next exciting lessons!